Hardware
Skate Boy Classic
The Skate Boy classic is an interactive sound installation, made by Christian Gjelstrup and Thorbjørn Nyander Poulsen, that provides Gameboy-generated auditory feedback to skaters as they skate through the ramp. The installation is using only a classic Gameboy (DMG) to generate the sound. To interface the Gameboy, they used LSDj in keyboard mode. The triggering mechanism in first version was realized with homemade triggers made out of cardboard and aluminum foil. In the second revision they repurposed an infraread burglar alarm sensor to trigger the sound when the unsuspecting (?) skater swooshed by.
The project is apparently part of their education on Medialogy at Aalborg University.
DMG replacement motheboard
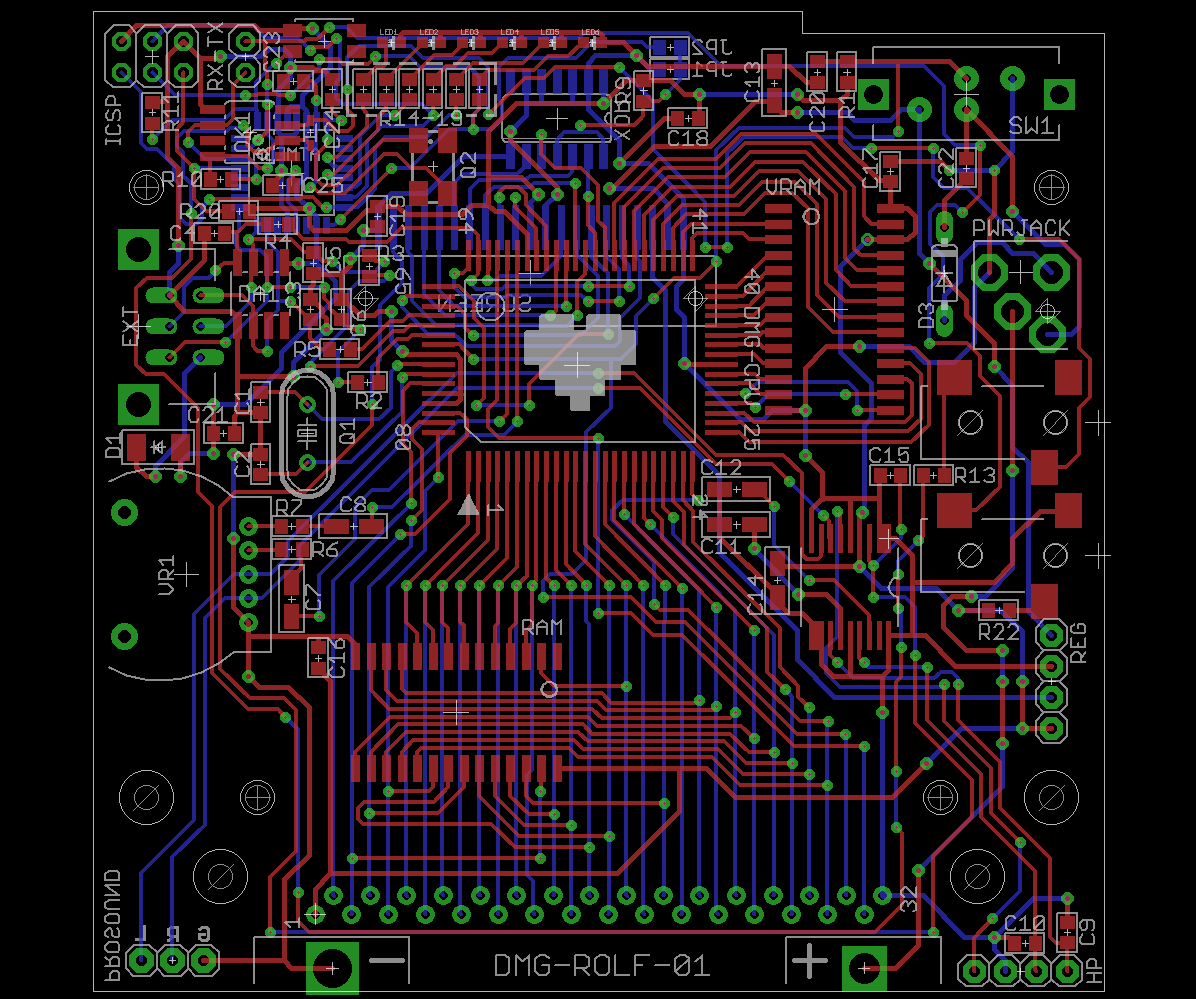
Rolf is working on designing a replacement board that can accommodate a DMG CPU as well as an Atmega168 that can be used for “ArduinoBoy” (a microcontroller program that allows a Gameboy to be receive MIDI) as well as holes in the PCB for the ever so popular “ProSound” mod.
Only some DMG revisions have the chip type CPU; most have an epoxy blob type CPU. However, a SGB CPU can be used instead. Not only are they pin, and otherwise, compatible, but the SGB CPU provides a fast and silent boot process without showing the Ninty logo or playing the start-up sound.
NES RetroVision – Gameboy on a NES cartridge

Finally a new post on this blog. ![]()
RetroVision by RetroUSB is half a Gameboy attached to a NES cartridge which converts the display data into something the NES display using magic programmable logic, much like Super Gameboy for SNES or or Nintendo’s Demo Boy which was used in stores to showcase Gameboy games. The RetroVision does contain an authentic DMG motherboard; there are even holes in the cartridge for the link port and headphone output, although the sound is supposedly routed to the NES as well.
Here’s my own criticism/nitpicking of the product:
- It lacks screen stretching. While I of course understand that this would take some effort, especially with the 3/2 zoom ratio needed to fill the screen, I think it would’ve greatly increased the general appeal of this product.
- Another thing that would increase the appeal of the product for musicians would be if you offered the so called ProSound mod, i.e. bypassing the onboard amplifier which gives a slightly better sound quality. Perhaps with RCA sound outputs.
- You could probably simplify the manufacturing process a bit by using a ribbon cable instead of individual wires for the video signal.
- Away with the DMG’s power regulator board! There’s absolutely no reason to keep it, but one good reason to throw it away, namely that it produces noise. The NES should supply a perfectly adequate 5V while the (nominal) -18V isn’t needed since the LCD isn’t there anymore.
The RetroVision will sell for $130, but so far only 4 units have been produced because of the intricate manual assembly process. BunnyBoy of RetroUSB doesn’t expect this to a big seller, but more of a platform to build other future products on.
SGB bootstrap ROM dumped by Costis
About 6 years ago Neviksti managed to dump the internal 256 byte bootstrap ROM used by the DMG (First model Game Boy) to scroll down Nintendo logo, play the po-ling sound and confirm that the cartridge header is in order before allowing the cartridge to be executed. He did so by opening up the epoxy covering the chip and reading out the memory visually bit by bit though a microscope. This was groundbreaking because there was no ordinary way to read the ROM as it was shut off by an internal register after boot-up.
Just the other day, costis dumped the corresponding ROM image from the SGB (Super Game Boy) with a slightly different method, namely clock glitching. Costis’ method is using an FPGA to run the system clock normally up until the point where the protection register is to be written. At that point the clock frequency is increased to such a fast speed that the write is ignored by the protection register and the execution continues into the user code, which then dumps the 256 byte big code. The operation was surprisingly painless according to costis himself. Next up is the GBC which is believed to have a bootstrap ROM bigger than 256 since its start-up procedure is much more advanced, distinguishing between GBC and DMG, and letting the user choose palettes for monochrome games.
For more info, see costis’ SGB hack page.
Official Nintendo Game Boy Flash Cartridge Board Scans

Official Nintendo Game Boy Flash Cartridge - Back side

Official Nintendo Game Boy Flash Cartridge - Front side

Official Nintendo Game Boy Flash Cartridge - Cartridge Shell
These are official Game Boy flash cartridge sold in Japan. You would go to a designated flashing station and have your cartridge flashed for a cheap price.
The cartridge is marked DMG-MMSA-JPN and the board is marked DMG-A20-01 (I’m not sure whether the character after the 2 is a zero or upper case o – I’m actually leaning towards the latter as it appears to be a little bit wider than the following 0)
The board contains three intergrated circuits.
- 29F008ATC-14 – 8 Mbits (1 Mbyte) flash ROM. I can’t find a datasheet for it, so I’m guessing it’s a custom or OEM chip. I’ve seen Mask ROMs/OTPROMs in game cartridges also marked MX, so Nintendo probably had a contract with them.
- UT621024SC-70LL – 1Mbit (128 kBytes) of battery packed save RAM.
- MX15002UCA – Custom logic chip marked G-MMC1. The apparent function of this chip is MBC like functionality. Maybe there’s more to it too, like the ablity to offset the ROM and RAM addresses for multigames or flash memory protection? Details unknown. There’s an unused place for a crystal.
Note the square boxes on the back side, of the PCB, on the opposite side of the connector that goes into the cartridge header. These were most likely used in the factory to program the cartridge initially. Notice how the “unimportant” system clock and external audio inputs are missing this box. Also note the nice rounded PCB traces. Not often you see these. Visually appealing, indeed.
And maybe it’s a sign I’m getting too little sleep that I’m seeing a “face” in the image.

The scans are provided by Duo.
Original development boards for Gameboy and other consoles

Gameboy Wideboy development board

Gameboy Test Cartridge
This page has a list of development kits and test cartridges for various 8-bit era consoles and handhelds, including Gameboy and Gameboy Color. The top picture is the so called WideBoy which is a device that you plug on top of a FamiCom. It duplicates the image to the TV attached to the FamiCom to relieve the eyes of the poor developers. The bottom picture is a funny looking cartridge which is in fact just a simple EPROM cartridge.
Thanks nordloef for the tip.